
How to Install Windows 11 from USB – Fast and Simple Steps
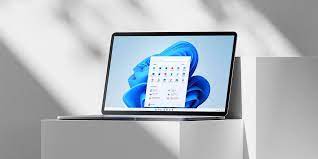
Windows 11 has become a trending operating system upgrade, featuring a refreshed interface, enhanced security, and an array of new features. If you’re ready to upgrade your system, installing how to install windows 11 from usb is one of the simplest and most efficient methods. This guide will walk you through the process step by step, ensuring a smooth installation.
What You’ll Need
Before jumping into the installation, make sure you have the following items prepared:
• A USB Drive with at least 8GB of storage.
• Windows 11 Installation Media (you can create this via Microsoft’s Media Creation Tool).
• A Compatible PC that meets the Windows 11 system requirements, including the TPM 2.0 and Secure Boot features enabled in BIOS.
Step 1: Create Your Bootable USB Drive
1. Download the Media Creation Tool
Search for the official Media Creation Tool download page and download the tool onto your existing system.
2. Insert the USB Drive
Plug the USB drive into your PC. This drive will be formatted during the process, so back up any important data before proceeding.
3. Run the Tool
Open the Media Creation Tool, select “Create installation media (USB flash drive, DVD, or ISO file)” and follow the prompts. Ensure you select the correct architecture (64-bit for most modern PCs).
4. Complete the Setup
Once the process is complete, you’ll have a bootable USB drive with Windows 11 installation files ready to use.
Step 2: Boot from the USB Drive
1. Restart Your PC
Plug in your newly created USB drive and restart your computer.
2. Access Boot Menu
During restart, press the key to enter the boot menu (usually F12, F2, or Delete, depending on your device manufacturer).
3. Select USB Drive
Once the boot menu appears, select your USB drive as the preferred boot option and press Enter.
Step 3: Install Windows 11
1. Begin Installation
The Windows setup screen will appear. Choose your language, time, and keyboard preferences, then click “Next” and “Install Now.”
2. Enter a Product Key
If prompted, enter your valid Windows 11 product key or skip this step if you are upgrading from a licensed Windows 10 installation.
3. Partition Your Drive
Select the partition where you want to install Windows 11. Format it if necessary, then click “Next” to begin installation.
4. Follow Prompts
Windows will begin copying files and setting up the system. This process will take a few minutes, so be patient.
Step 4: Finalize Your Setup
Once the installation is complete, your computer will restart. Follow the on-screen instructions to personalize your settings, connect to a network, and log in with a Microsoft account.
Congratulations! You’ve successfully installed Windows 11 from a USB. Enjoy the sleek interface and enhanced performance of Windows 11 on your PC.